DualLiner Truck Bed Liner Installation Instructions
From Bare Paint to Protected in Four Simple Steps
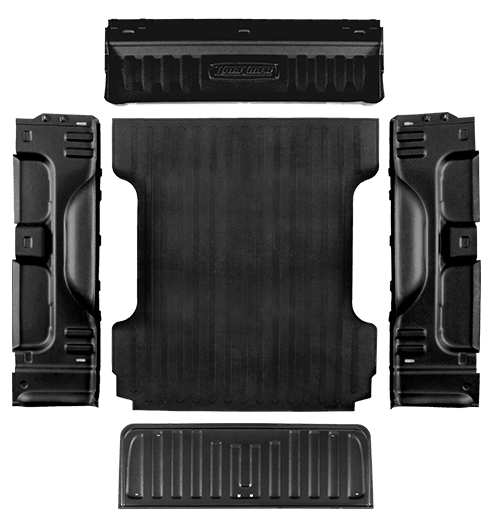
- Pop in the loadguard (closest part to cab)
- Snap in the sidewalls
- Lay in the ZeroSkid® rubber mat into the “C” channel
- Add the tailgate protector*
- That’s it.
*A Tailgate Protector is not included with some truck models due to Factory Tailgate Accessories that do not require a protector.
More detailed truck bed liner installation instruction below.
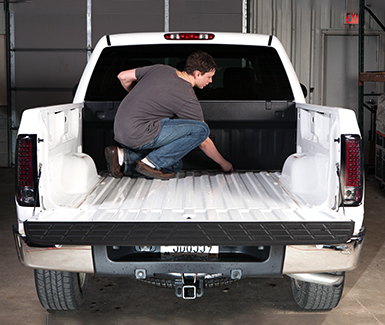
Step 1
Install the Loadguard
For most truck models, the DualLiner loadguard component simply snaps into place. Since all DualLiner bed liner components are custom fit to each vehicle, the loadguard may be a bit snug. If you are having problems getting the loadguard around your truck’s factory tiedowns, simply install one side, place your hand behind the loadguard, gently bend it to give you some extra room and slide the other side into position.
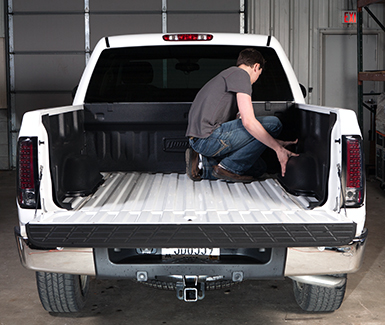
Step 2
Install the Sidewalls
On trucks with welded-in tie downs, all you need to do is snap the sidewalls into place. If your truck has bolt-in tie downs, remove them first, snap the sidewalls into place and then re-install the tie downs. Be sure you have the sidewalls aligned properly prior to tightening the bolts.
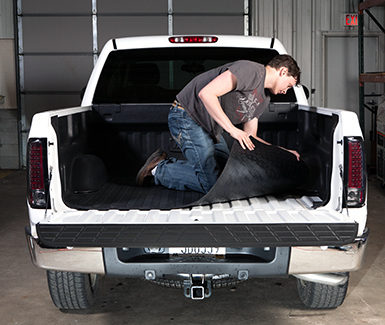
Step 3
Unroll the ZeroSkid® Rubber Floor
The skid-free rubber bed mat that comes with your DualLiner bed liner is easy to install. Simply lock it into the channels at the bottom of the sidewalls. The cleated bottom of the rubber mat promotes airflow and helps to prevent water from building up under the mat to deter corrosion.
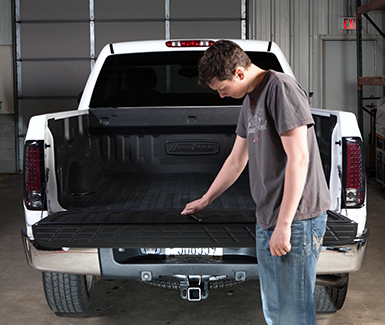
Step 4
Install the Tailgate Protector
On most truck models, simply remove the tailgate bolts that line up with the holes in the DualLiner tailgate protector. There could be anywhere from 4 to 12 bolts, depending on your model of vehicle. Be sure not to over torque the bolts, as the sheet metal is easily stripped. Some models also ship with double-sided tape or optional drill-in pine tree fasteners for trucks with few factory bolts.
Boom. You’re Done.
Easy, huh? If you have any questions with your truck bed liner installation, please contact us and we’ll be happy to assist you. Be sure to send us some pictures of your newly installed DualLiner bed liner and we will send you a free gift.
Just researching and haven’t made a purchase yet? Head over to the DualLiner product page to find the right model for your truck.
Installation Videos
Model specific truck bed liner installation videos are below.
Ford F-150 Bed Liner (2004 – 2014)
Ford F-150 Bed Liner (2015 – 2023)
Ford Super Duty Bed Liner F250 or F350 (1999 – 2016)
Ford Super Duty Bed Liner F250 or F350 (2017 – 2023)
Chevy/GMC Bed Liner (1999 – 2007)
Chevy/GMC Bediner (2007 – 2013)
Chevy/GMC Bed Liner (2014 – 2018)
Dodge Ram Bed Liner (2002 – 2007)
Dodge Ram Bed Liner (2007 – 2009)
Dodge Ram Classic Bed Liner (2010 – 2023)
Dodge Ram Bed Liner New Body Ram 1500 (2019 – 2024)
Model specific installation instructions are below.
Ford F Series (2004 – 2014) Installation Instructions
Ford F150 (2015 – 2020) (5ft 6) Installation Instructions
Ford F150 (2015 – 2020) (6ft 6) Installation Instructions
Ford F150 (2021 – 2023) (5ft 6 & 6ft 6) Installation Instructions
Ford F150 (2015-2023) 8’ Installation Instructions
Ford Super Duty (1999 – 2010) 6.75’ & 8’ Installation Instructions
Ford Super Duty (2011-2016) 6.75’ Installation Instructions
Ford Super Duty (2011 – 2016) 8′ Installation Instructions
Ford Super Duty (2017 – 2022) (6ft 6) Installation Instructions
Ford Super Duty (2017 – 2022) (8ft) Installation Instructions
Ford F150 (2021-2023) Install Instructions
Ford F150 (2021-2023) with Work Surface Tailgate, Install Instructions
2023 Ford F250 or F350 Super Duty with a 6.9′ Bed
2023 Ford F250 or F350 Super Duty with a 6.9′ Bed (without Tailgate Liner)
2023 Ford F250 or F350 Super Duty with an 8′ Bed
2023 Ford F250 or F350 Super Duty with an 8′ Bed (without Tailgate Liner)
Chevy/GMC (1999 – 2007 “classic”) Installation Instructions
Chevy/GMC (2007 – 2013) Installation Instructions
Chevy/GMC (2014 – 2018) Installation Instructions
Dodge Ram Classic (2010 – 2023) Installation Instructions
Dodge Ram Classic (2002 – 2008) Installation Instructions
Dodge Ram New Body (2019 – 2024) Installation Instructions